Sunday, November 29, 2015

Kitchen schnanagins

So this weekend I cooked.  This really isn't a big surprise to my family and friends.  I love cooking.  I've included several pictures of some of the things I tried this weekend.  Some  are new and some are family favorites.  Thanksgiving lunch or dinner, it really doesn't matter when it it is served, rarely changes.  My family really likes it this way.  Waffles are a standard weekend breakfast, probably my favorite.  I've already shared the French bread recipe and the chocolate pretzels are just pretzels dipped in white chocolate bark.  I usually make them twice in the Christmas season.  The  Crackle Cookie and the French Christmas Cookies were new and will be made again.    I really like to serve several types of cookies on a platter for dessert this time of year.


Thanksgiving lunch.  This included turkey, stuffing, potatoes, Door County salad, pumpkin muffins, cranberry sauce and sweet potato and apple purée. 
Waffles the day after thanksgiving.  We of course at most before I remembered to snap a picture.
French Christmas cookies.  
French bread ready to go into the oven and white chocolate dipped pretzels. 


Peppermint crackle cookies. 


I thought I'd share our favorite waffle recipe with you this week.

Bon Appétit!
Beth

Waffles - adapted from Beth Hensperger's The Bread Bible
3 eggs beaten
1 T vanilla
1 T baking powder
1 1/2 cups milk
6 T butter -melted
2 cups AP flour


Mix all ingredients together and make according to your waffle maker. In mine it makes about 8 waffles.  I like to add some ground flax seed on top of my waffle before baking.  

Tuesday, November 17, 2015

Apples again!


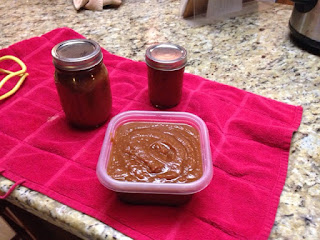
So last week was apple pie, but as I mentioned last week I bought a bushel of apples.  So I found a recipe for apple butter using my slow cooker in Eating Well magazine. There was quite a bit a apple butter even after the apples cooked down so I decided to can some of it.  If you have't checked out pickyourown.org it is a great wealth of recipes and tips for canning.  They have super simple steps for anyone to follow.  Since the recipe used my slow cooker I started it late Saturday morning and finished up with everything by mid Saturday afternoon.  I also always feel accomplished after canning something.  

I still have a few apples left, probably just enough for applesauce this weekend and maybe a pie or a crisp.

My large crock pot filled with apples.
Final product, some for know and some for later.
Here is the recipe for Apple Chai Butter:
5 lbs apples peeled and chopped
2/3 cup brown sugar
1T vanilla extract
2 tsp cinnamon
2 tsp cardamon
2 tsp ground coriander
2 tsp ground turmeric
1/2 tsp salt.  

Mix everything in the slow cooker and cook on High for 5 hours, then but the lid a-jar and continue cooking for another 2-3 hours.   If you like your apple butter smooth, like me, just use and immersion blender.  

Bon Appétit!
Beth 

Tuesday, November 10, 2015

Easy as Pie

Apple pie is one of my favorite types of pie. Last weekend I purchased the last of the local apples, about 1 bushel worth.  I know I'll be making apple desserts, sauce and baked apples for the next month or so.  I don't remember where I got  this recipe for apple pie but it is a family favorite.  I like to use a combination of Macintosh and Cortland apples, but you can use what you have on hand. I won't lie for this pie in the picture I used the Pillsbury roll out crust.  When I do have time I like to make a homemade crust, but that really wasn't in the cards last weekend.  If you like to have a double crust pie don't make my butter and sugar topping.  Enjoy the recipe below or just be inspired to play in your kitchen and make some delicious treats for fall.

Pie filling and the 2 1/2 bushels in the background.

right out of the oven
For the Filling:
Peel and slice 7 large apples.  Combine the apples with 1/3 c sugar, 1/4 c AP flour, 1 tsp lemon juice, 2 tsp vanilla extract and spices to taste. (cinnamon, nutmeg and allspice)

Add the apple mixture to the crust.

For the topping:
Combine 1 cup AP flour, 1/2 cup sugar and a combination of the same spices listed above or none at all.  Add 1/4 tsp salt.  Mix all together and add 6 T of butter cut into bits.  I like to combine the mixture with my hands until it becomes small pea sized bits.  Add on top of the apples.

Bake for 20 minutes at 450 degrees and then reduce to 350 degrees and continue cooking for 35-40 minutes.

Bon Appétit!
Beth 


Monday, November 2, 2015

DIY Glitter Pumpkins

So I thought I'd do a little something different this week, even though it is a day or two late.  I'm including guest blogger, and daughter,  Maddie's post on glitter pumpkins.  We have 2 of them on our front porch and they look great. Also unlike carved pumpkins they don't rot. What could be better.  So maybe tuck this one away for next year or think of other outdoor items you can put glitter on. 

Enjoy and also check out Maddie's blog at http://classyandclever.blogspot.com/ 

Pumpkins are the quintessential fall decoration. This pumpkin is even cuter than your everyday plain orange pumpkins. And what, may you ask makes this pumpkins better? Why glitter of course! It makes a fun decoration that add a little something to every area it occupies. I got the idea from this pinterest post. This was so easy to make, and with so little supplies needed, it makes the perfect decoration. So enough about how cute this is, here the instructions.

Materials:
  • Pumpkins (I chose a medium size)
  • Glitter
  •  Spoon
  • Spray adhesive or mod podge 
  • Small paintbrush (if using mod podge)
  • Cardboard or newspaper
How to:

Get all of your supplies together so you don't forget anything.
Lay down the cardboard or newspaper so you don't make mess. I 
used a broken down vineyard vines box for this. You also might want to think about making these outside because it does make a considerable amount of a mess.


Grab your pumpkin and tape. Tape the stem of the pumpkin up so you don't get any glitter on it. It doesn't really matter what type of tape you use, just make sure that you can easily take it off when you're done. 


Take the spray adhesive just spray it on the pumpkin where you want the glitter. It doesn't dry right away so you can spray the whole top right away or just do it in little sections.


Use the spoon to help control the amount of glitter you put on the pumpkin at a time. I didn't do to good of a job at the control part, but it did help me keep the glitter confined to the area I wanted it. 


As you can see, glitter is all over the place so just fold up the paper and put the glitter back into the container so it isn't all wasted. My glitter is going into an old medicine container because it's our "mixed glitter" container.


Now the pumpkin is almost done, all you have to do is take off the tape and it's done!


It took me about 20 minutes to do this whole thing and it is totally worth it! This is probably the best pumpkin that I have made in a long time!


Happy Halloween!
xoxo,

Maddie